
Can I pick which analytes to display, and change the grouping, order, and units?
Yes, you can do this by creating a Chemistry Profile.
Each ESdat system has a default chemistry profile which is usually called “System Default”. It is designed to be a one size fits all chemistry profile that is suitable to display chemistry data for a wide range of purposes. However, there are instances when this may not be suitable and as a user, you may wish to display your analytes differently.
Creating a Chemistry Profile:
The easiest way to create and edit a chemistry profile is from Data Views – Chemistry Table, OR Lab reports – Chemistry Table. The idea is to create a table that includes all of the analytes you wish to display and then customise the analytes within the Chemistry Profile from the Chemistry profile menu. Completing this task in the Chemistry Table View allows you to receive instant feedback – the Chemistry Table will auto update as you make changes to the Chemistry Profile.
Open the Chemistry Table, apply any filters that assist with displaying the results you wish to use in the Chemistry Profile. Select any environmental standards and sample information that you wish to display.
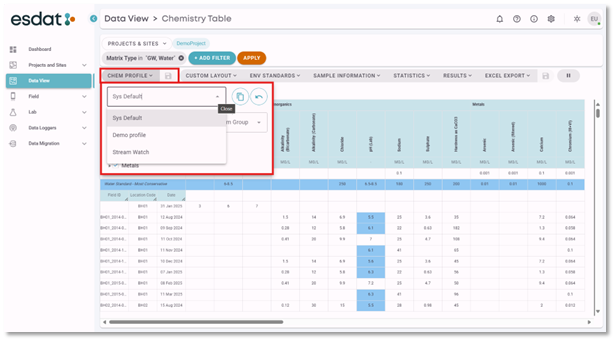
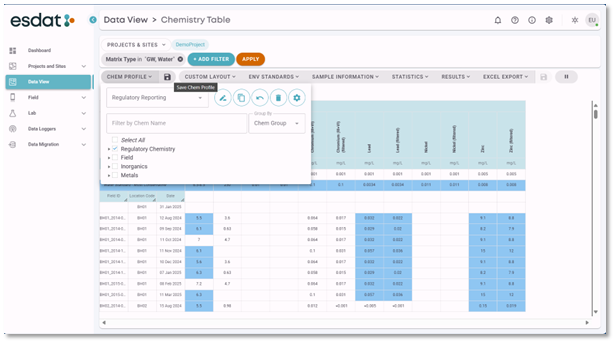
Select the Chem Profile Menu and select a Chemistry Profile from the drop down.
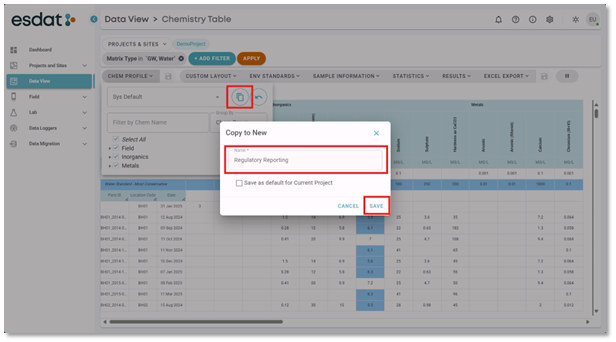
Select the “Copy to New” Function, Give the new Chemistry profile a name and select SAVE.
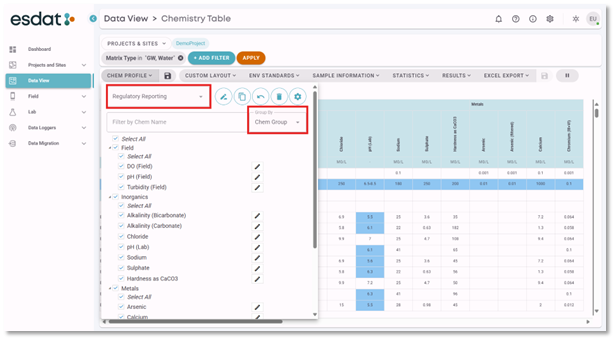
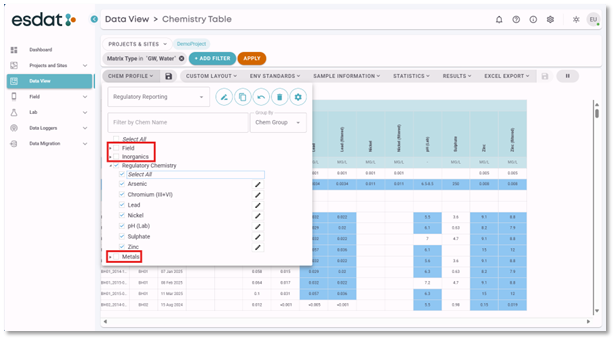
With the new Chemistry Profile selected in the menu, make sure the Group By option is set to “Chem Group”. Expand each of the Chem Groups so you can view the analytes.
To begin, select an analyte from the list that you wish to edit by selecting the edit icon.
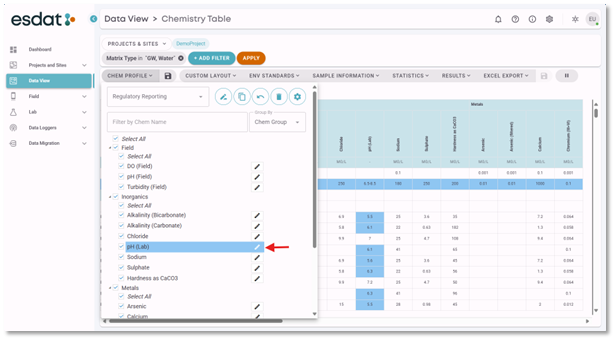
A pop up will appear that displays the Analyte properties for the selected chemistry profile.
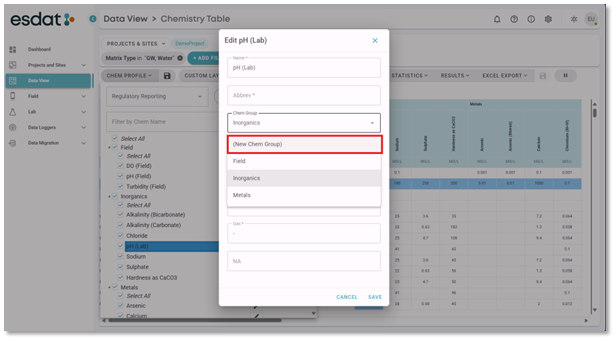
Open the Chem Group Drop Down – this will only show chemistry groups that are included in the current chemistry table. Select (New Chem Group)
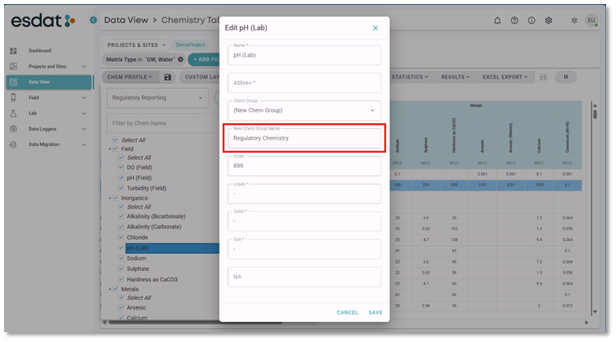
Give the new Chemistry Group a name and select SAVE to complete.
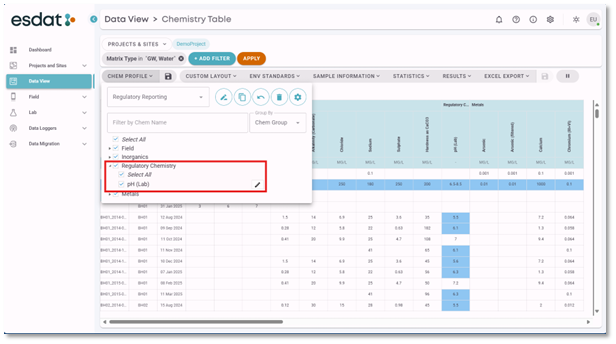
The selected analyte is now placed in the new chemistry group, which I have called Regulatory Chemistry. This now appears in the chemistry profile menu.
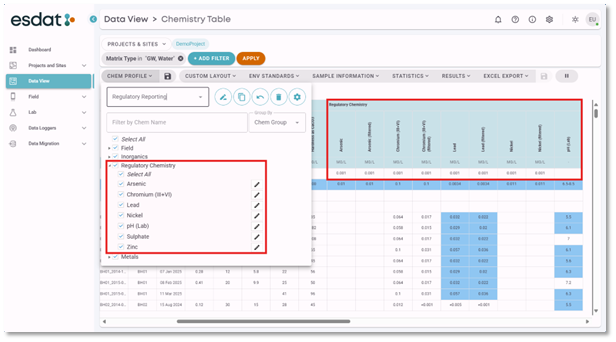
Other analytes can now be added to the newly added Chemistry Group by editing the analyte details and selecting the chosen group from the chem group drop down.

Add all the analytes you wish to include in the selected Chemistry Group
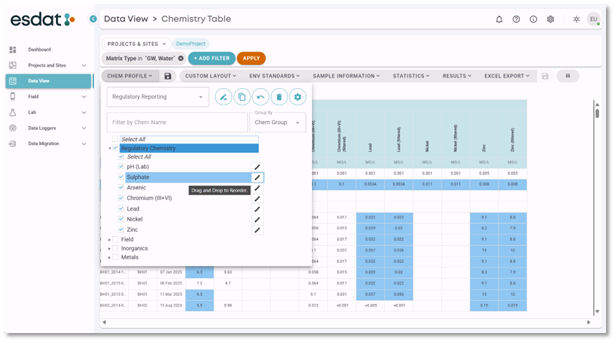
You can see this group displayed in the Chemistry Table.
I do not want to display any of the other analytes in my table – you can turn them off by unselecting the chem group in the chem profile menu.
Chemistry Groups can be reordered. Select the Chemistry Group to Drag and Drop.
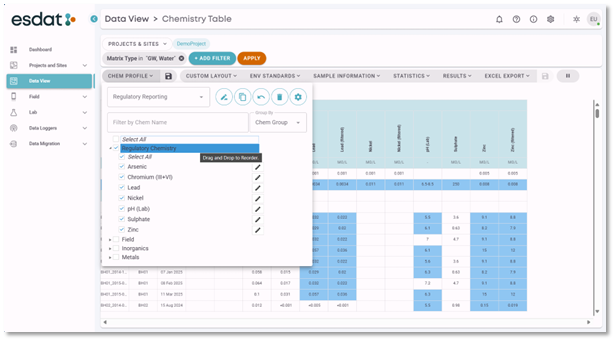
Analytes can also be reordered within the Chemistry Group, Drag and Drop the individual Analytes so they are in the order of your choice.
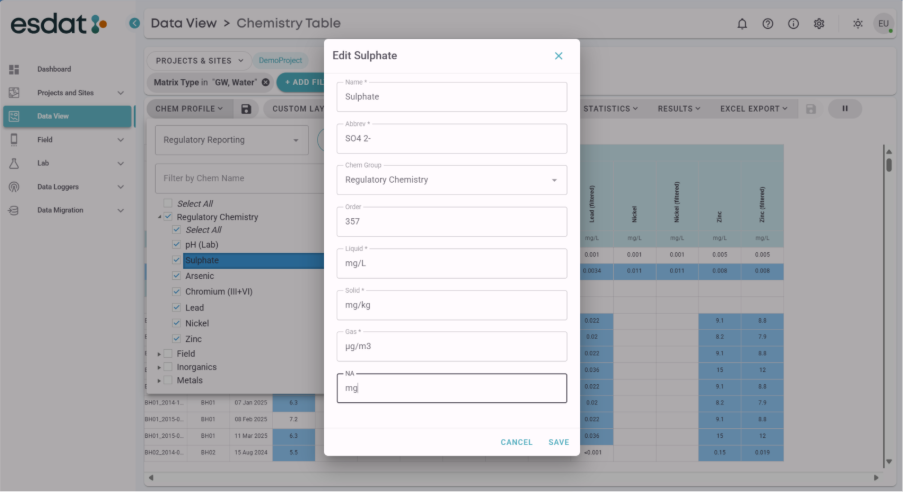
Finally – edit each analyte in your chemistry group to have the display parameters of your choice.
You can edit:
Name – the name that appears on the table
Abbreviation – an abbreviation for the analyte – these appear on Maps
Chem Group – select from the drop down or add new as described previously
Order – in this example we have used drag and drop to reorder the analytes within a group. Analytes can be reordered manually by selecting a number here, Analytes will appear on the table in numerical order.
Units for Liquid, Solid, Gas and NA – these are the units that will appear on the Chemistry Table.
Once all of the changes to the analytes are complete, save your chemistry profile.
The Chemistry Profile will now be available from the Chemistry profile Drop Down. It can be selected any time you wish to use the chemistry profile to set the analyte display parameters for your Data Views.
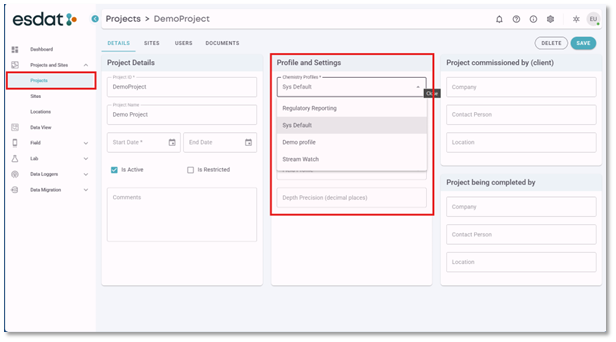
You can also set a Chemistry Profile as a default for a project. This means that when that project is selected in the data views “Projects and Sites” Filter the chosen default Chemistry profile will be applied automatically.
Using this functionality is an excellent way to save time when creating reporting outputs.