
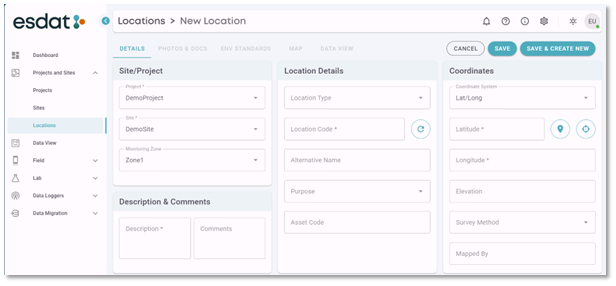
What information should I include when I create a Location Code?
In ESdat, the only information it is compulsory to include when creating a location is the Project the location is being uploaded to, the site the location code is associated with, and location code - which is the unique identifier for that location.
Did you know there is a wealth of other information that can and should be populated when creating location codes?
Monitoring Zone:
Adding in Monitoring zone information allows an additional grouping that is associated with the site. Common examples of monitoring zones may be:
Grouping location codes based on the site features that are being monitored
Sediment Dam, Tailings Storage Facility, Downgradient Boundary, Upgradient Observation, Sensitive Receptor, Construction Zone A.
This can be very useful when trying to create chemistry tables for each of these location groupings. Instead of having to remember which locations belong to these categories this information is stored in ESdat and can be called on to create a filter. Example: “Monitoring Zone = Construction Zone A“
Location Type:
The location type is commonly used to provide information regarding what sort of monitoring point is situated at the location.
Examples include: Borehole, Groundwater Monitoring Well, Surface Water Monitoring Point, Soil Sample, Stockpile Sample, Test Pit.
The location type is expressed as an abbreviation. These can be pre populated into ESdat using the Listings Functionality in the Administration menu. When using the Listings Functionality the abbreviation can be specified with the description provided alongside to assist users in selecting the correct location type.
By combining the additional information specified so far – the monitoring zone and the location type we can now utilise the Generate Location Code functionality.
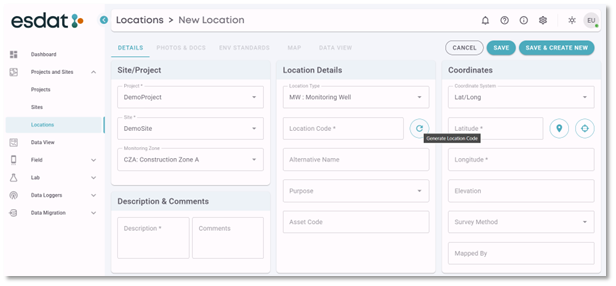
Generate Location Code:
The Generate Location Code functionality will auto create a location code based on the following:
Location Information | Example Information |
| Site Prefix | DS |
| Monitoring Zone Prefix | CZA |
| Location Type | MW |
| Incremental Count Length | 3 |
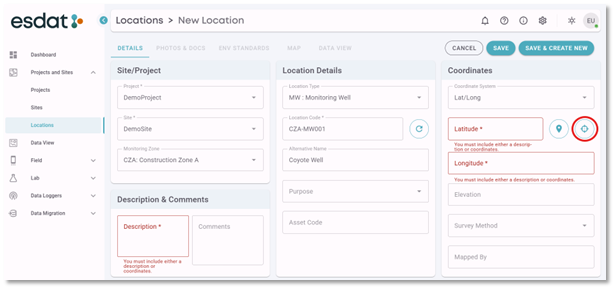
The new location code generated is: CZA-MW001
When a Monitoring Zone is specified, the Monitoring Zone prefix is used in the location code. If a Monitoring Zone is not selected, or the monitoring zone does not have a prefix specified the Site Prefix will be used instead.
The Generate Location Code Function is an excellent method of creating unique location codes which adhere to a set format. This assists with creating reports – when sorting by Location Code locations will be grouped by Site – Monitoring Zone – Location Type. Then ordered numerically in ascending order.
Adding on to the filter we have [Monitoring Zone = “Construction Zone A” AND Location Type = “MW”] this will return results from all monitoring wells in Construction Zone A.
Alternative Name:
The alternative name allows a second name to be provided which is then included in any searches for locations. This is not a compulsory field but can be helpful when locations are referred to by different names.
For example; A site has an observation bore located on a private property. In the regulatory licence the bore is identified by a numeric identifier 91573, this is difficult for the local field staff and the client to remember, and they refer to the monitoring well as “Bobs Bore” Both names need to be displayed together in client reports, however the report to the regulator can only have the numerical identifier. By using the numerical identifier as the location code and adding the colloquial name as the alternative name this allows the location to be searchable by both and also allows either or both names to be displayed in reports.
Purpose:
Adding information in the Purpose field can provide additional information regarding what the sample information is used for or why the location has been selected.
Examples include:
- Historic Sampling Location
- Monthly Internal Reporting
- Regulatory Monitoring Network
- Regulatory Licence Identifiers
Purpose categories can also be pre-populated as a drop-down list using the listings feature in the administration menu.
Adding to our example filter now gives us:
[Monitoring Zone = “Construction Zone A” AND Location Type = “MW” AND Purpose = “Regulatory Monitoring Network”] this will return results from all monitoring wells in Construction Zone A which are part of the regulatory monitoring network.
Asset Code:
The asset code field can be used where the client has particular asset codes for monitoring infrastructure, or the monitoring points are associated with site infrastructure which has an asset code. It is similar to the alternative name field, but it is particular to Asset Codes.
Coordinate Information:
If you wish to view your data in a map coordinate information must be included. ESdat will not allow a location to be saved without either co-ordinate information or a note in the description.
The easiest way to add coordinates to a location code is by selecting the “Get Current Coordinates” feature.
If prompted, ensure you are allowing your device access to location services.
The Get Current Coordinates feature will capture your current location – ideal if you are out on site marking out investigation locations.
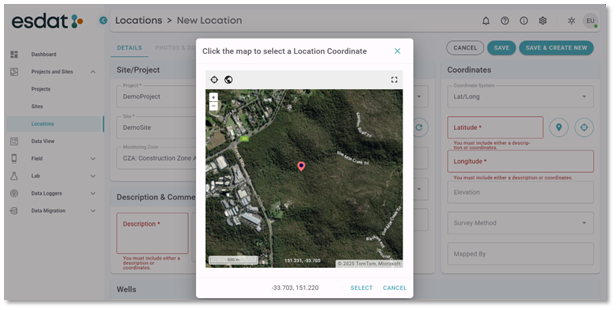
Location information can also be selected from the map – in this instance select the “select map position” option then navigate to the map location you are looking for and click on the map to select a Location Coordinate.
Coordinates can also be manually entered (if known) alongside elevation information.
Note: Location Coordinates can be bulk updated in Data Migration if required. For example, if survey information is provided following a site investigation.
Description and Comments:
Descriptions and comments can provide additional information and context regarding each location. These are not compulsory but can add vital information which can be displayed in reports if required.
Wells:
If Water level information will be collected at this location code, then a well must be created.
Well Name: the default well name is – (dash) unless a nested well is installed in which case the well name is the individual identifier for the particular nested well.
TOC: The top of casing in mRL. This MUST be included to convert water level in mBTOC to mRL. If they are not included, then water levels can only be displayed as meters below top of casing mBTOC.
Screen Depth (Top – Bottom): enter the screened interval in mBTOC as a range from top of screen to bottom of screen.
Monitoring Unit: The Aquifer or geological unit being monitored by this well.
Base Depth: Total depth of the well. If a well is recorded as dry, a broken line at the base depth of well is used when displaying the water depth or elevation in water level graphs.
Comments: any additional comments or information regarding the well and its construction.
Note: There are more fields which can be populated with information about the wells in the well import table in Data Migration.
Once you are finished creating a location don’t forget to select SAVE.
Including additional location information assists with filtering data and creating specific reporting outputs. It allows for greater control over data inclusion and display saving you time when creating reporting outputs.