
How can I upload and display groundwater level data that is collected in the field in ESdat?
Loading your Locations and Wells
To display groundwater data in ESdat, you will need to set up a Project and Site. Then create location codes and add in well information for each well that you will be collecting groundwater level data for.
More information regarding Project and Site Creation can be found at https://help.esdat.net/en/article/projects-and-sites
More information regarding Locations and Wells can be found at https://help.esdat.net/en/article/locations
More information regarding bulk Import and edit of Locations and Wells can be found at https://help.esdat.net/en/article/bulk-import-edit-locations-wells-chemistry-samples
Groundwater level data can be captured using the Field Portal or imported in bulk via the Data Migration Manager.
Using the field portal to capture groundwater level information
Expand the Field menu and select Field Portal and App – Launch the Field Portal.
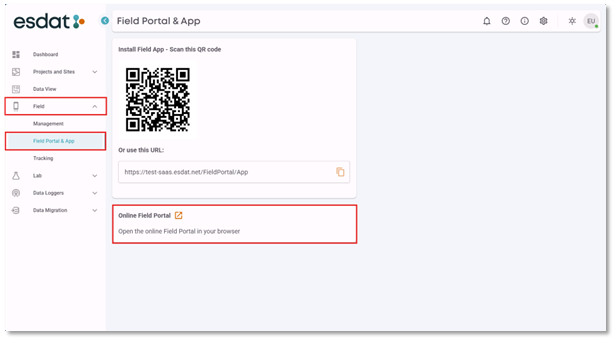
The Field Portal can be viewed in any modern supported web browser, it is optimised for usage on phones and tablets as well as large screens.
Select “Create Monitoring Round”
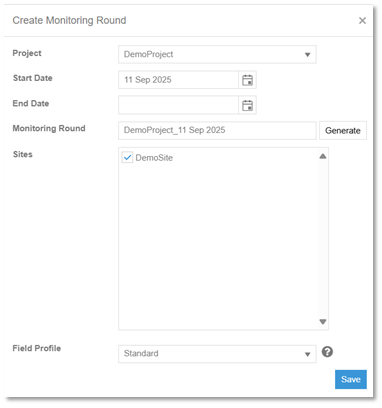
Populate the required Fields in your monitoring round:
- Select project
- Select Start date (Current date is default)
- Create a Monitoring Round name
- Select the Sites where the monitoring round will occur
- Select a Field profile
When selecting a Field profile, select one that has been configured for collecting groundwater information for example: Standard and Standard Stabilisations are both configured for collecting Groundwater levels.
Select “Create Location Visit” then select the location where you are collecting the water level information from.
The field sheet will then open:
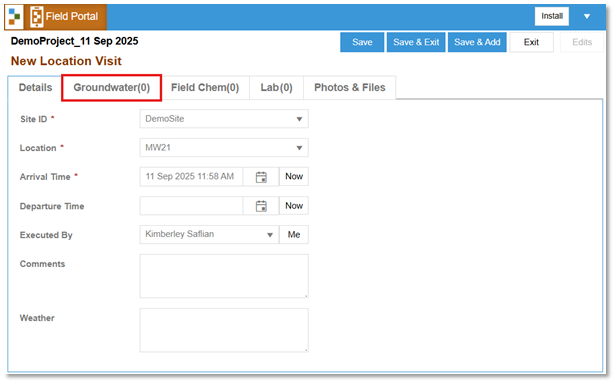
Location Visit Details are recorded on the first page of the Location Visit. Navigate to the 2nd page to access the Groundwater Level information.
Select “Add Groundwater Record” to expand the groundwater record page.
Select the well that is associated with the location code which you are going to be collecting the water level for.
There is also toggle switch for the well being “DRY” Yes/No.
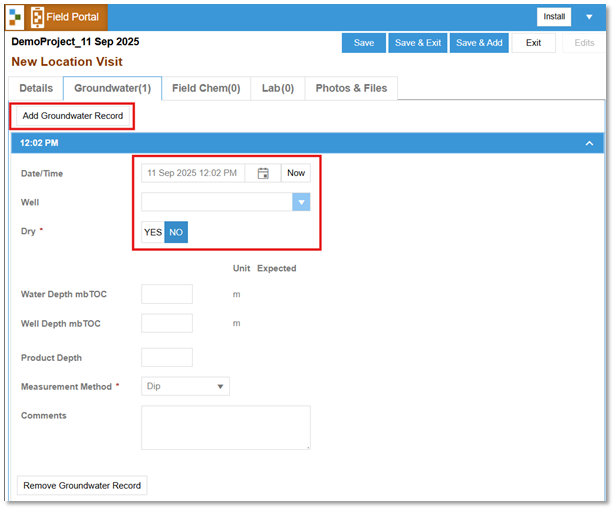
Water Depth is measured in meters Below Top of Casing
Well depth is also measured in meters below top of casing and refers to a well depth measurement completed during the location visit.
Populate the Groundwater Record and select Save to save your data. If you wish to take a photo of the location or the well that can be taken or uploaded using the Photos and Files page.
Repeat this process for all wells you are collecting groundwater level data from.
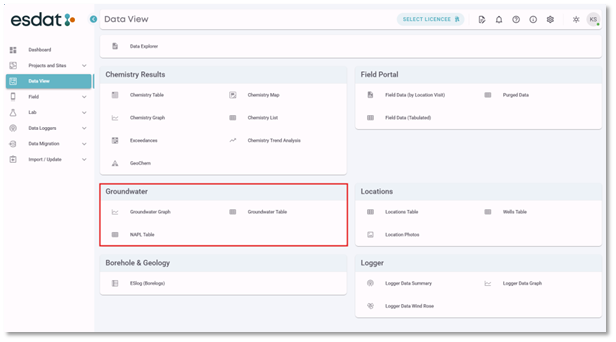
Once groundwater level data has been uploaded it can be displayed in Data View à Groundwater
Select the Project or Site that contains the groundwater level data you wish to display. Create a filter to display the locations or date ranges of your choice.
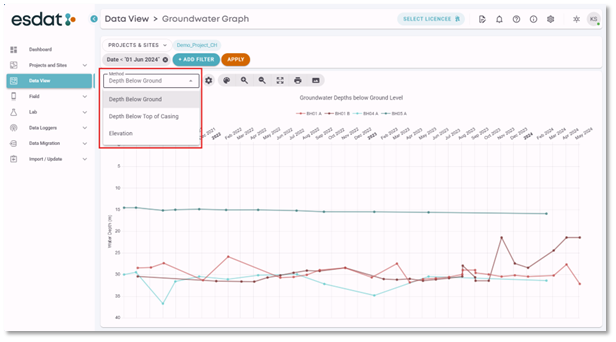
When selecting the Groundwater Graph there are 3 options:
- Depth below Ground
- Depth below Top of Casing
- Elevation
Not all display options are available. Why is this?
For groundwater Depth below Ground to be visible the location code must have ground Elevation information and the well must have Top of Casing RL information.
For groundwater Depth below Top of Casing to be visible groundwater data must have been imported as Depth.
Groundwater elevation can be calculated by ESdat if the location code has ground Elevation information and the well has Top of Casing RL.